


There is little real informative material left on the Shien Form. But Shien was said to have been created from more conventional styles.
The formula for Shien is divided into two aspects: The Lesser Krayt and Greater Krayt. The Body belongs to the lesser and the head and eye of the greater.
The Lesser Krayt forms the foundation and it is through the derivation of the Lesser that the Greater arises.
Shien is the octagon. The Greater Krayt originates from the center, the Lesser Krayt circles its prey. When one is on the outside, one is fast and hard to catch. When one is on the inside, they can close distance quickly with fast and direct attack.
The aspect of the Lesser Krayt: Moves in evasive circles and arcs around the center while wielding the blade on the sharp angles in between and intersecting. This application of the formula keeps the saber wielder moving at all times, never standing still and becoming difficult to hit. It uses positioning to cut off opponents and break up groups into smaller more manageable configurations. It is intended to allow one to face many. Blaster fire can be redirected and groups of assailants can be defeated by a single swordsman.
Greater Krayt: Moves in powerful attacks from the center. The center is assumed to be the swordsman. Movements use a wedge type of power that requires good control and strength to break through an enemies defense. More assumed to be melee and dueling combat against other lightsabers, its techniques redirect the energy coming in straight around the wielder while simultaneously attacking a zone or Mark of Contact.
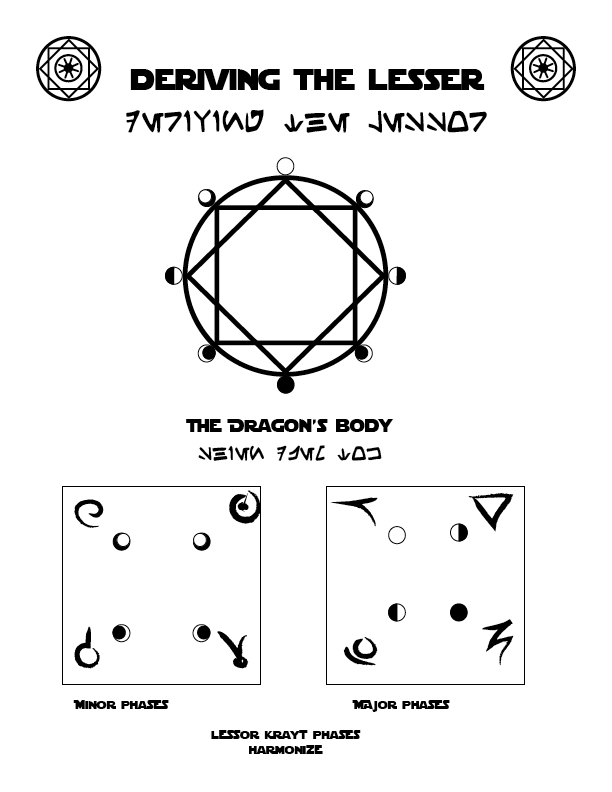
Deriving the Lesser
The way to derive the Lesser Krayt one must take the lessons of the first four forms to create the Four Pillars. Each pillar has two aspects; Ashla or rising and Bogan or falling. These are combined to derive the beginnings of the Lesser Krayt.
The Four Pillars
Each of the Pillars represent a stage in development for the swordsman. Each of these Pillars also teaches a lesson of combat and in turn form the foundation of the system. They are as follows:
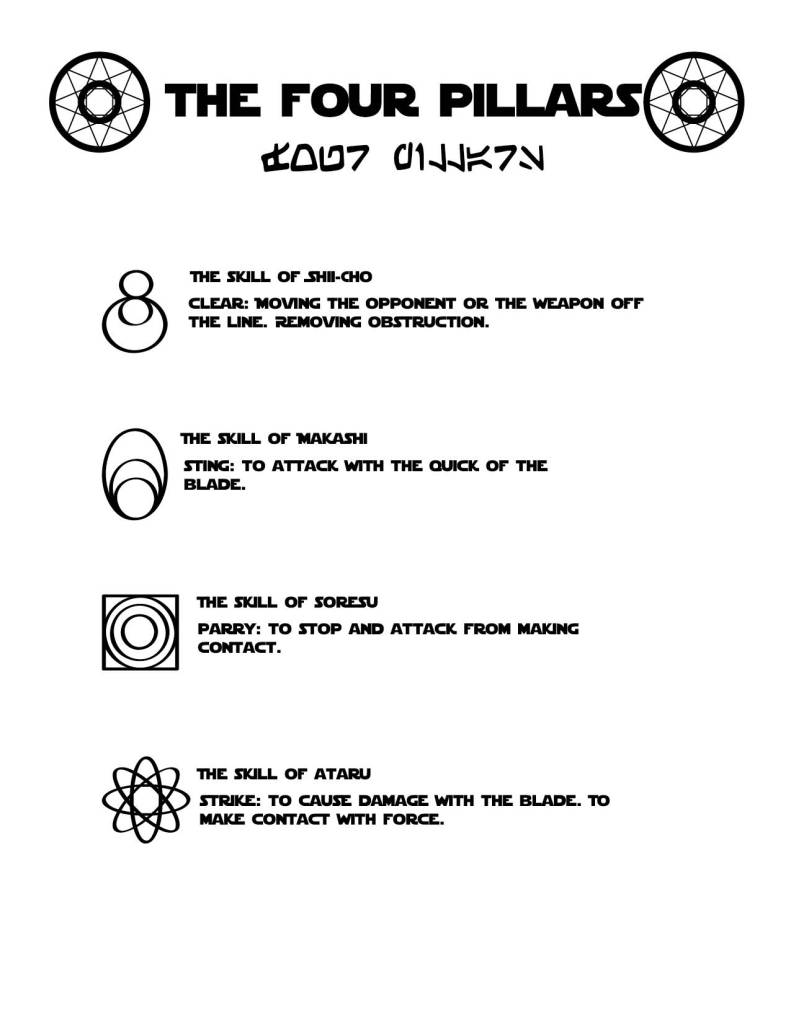
Clear: move the opponent or the weapon off the line. Removing obstruction .
Sting: attack with the quick of the blade.
Parry: prevent an attack from reaching you.
Strike: cause damage or disrupt the opponent with force.
Each of the pillars is extremely important. They represent al the basic actions done in combat with a saber or sword. Knowing how to clear your path, how to deal with each opponent, how to protect yourself, and how to deliver damage. Knowing the previous formula will take the lessons here and turn them from ethereal philosophies to practically based techniques.
The Two Phases
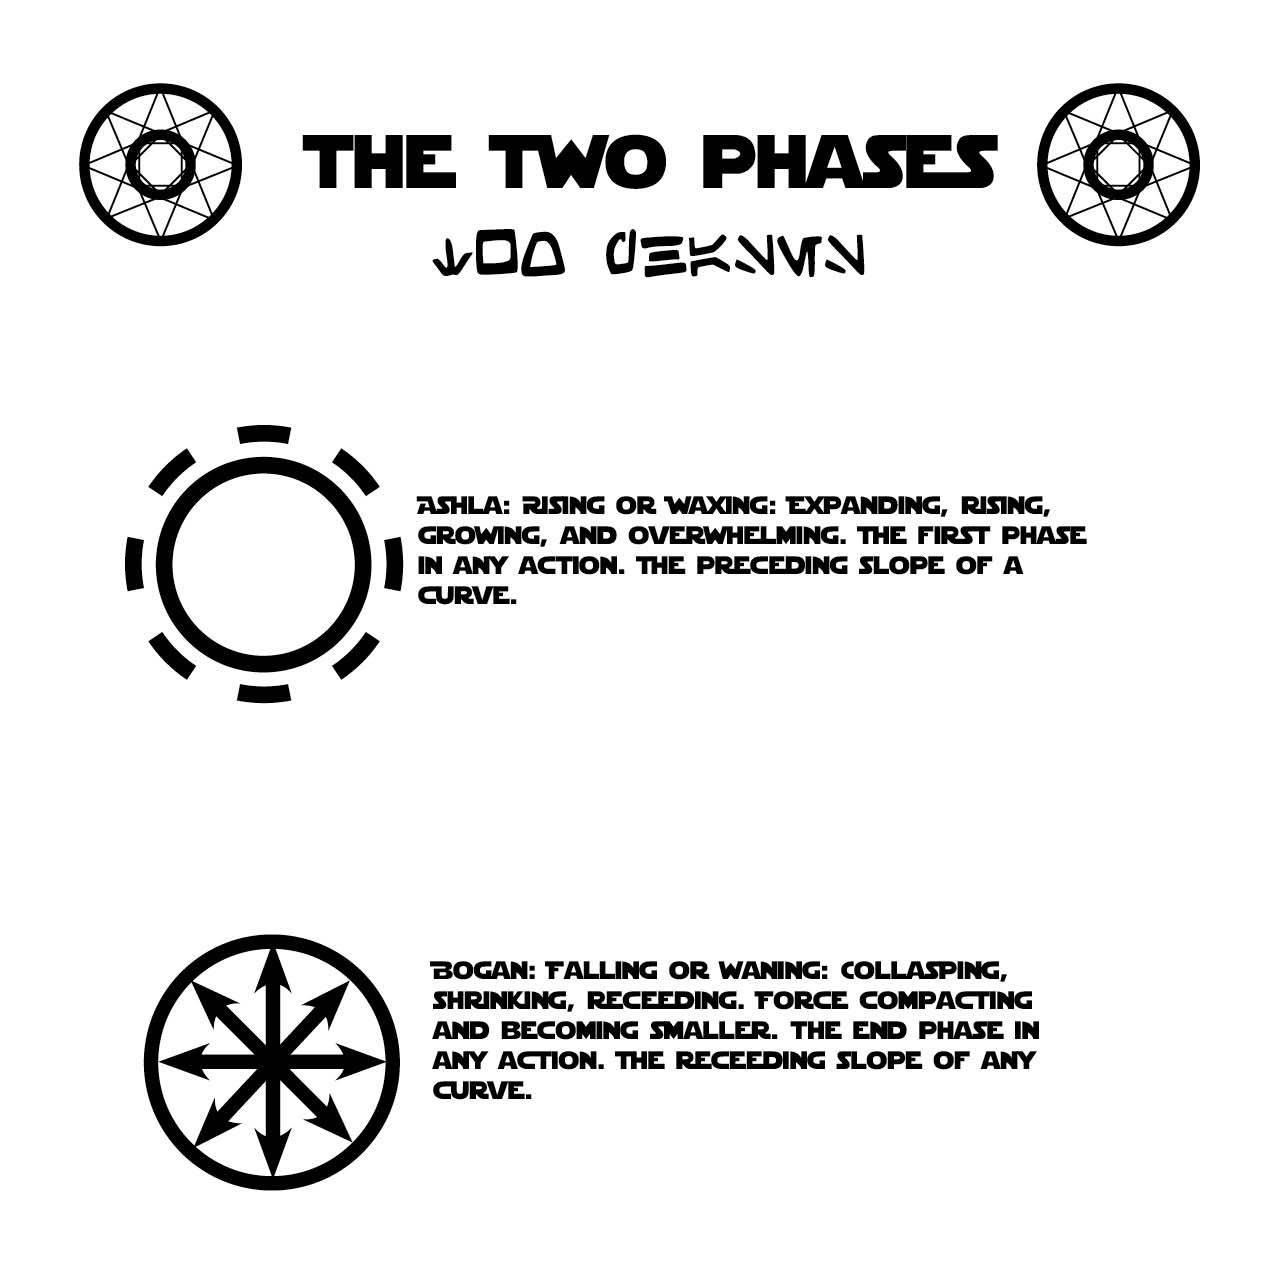
There are two phases to every action. The rising or waxing phase is the beginning. Its energy starts to action and then dissipates as the engagement continues. Falling or waning phase dissipates energy from the opponent and nullifies their attack. Covering strikes and close quarters grappling are dependent on this.
Ashla Rising or Waxing: Expanding, rising, growing, and overwhelming. The first phase in any action. The preceding slope of a curve.
Bogan Falling or Waning.: Collapsing, shrinking, contracting, getting smaller. The end phase of any action. The receding slope of a curve.
The 8 Zhu
Combining these techniques gives the eight “Zhu” (Trick/method):
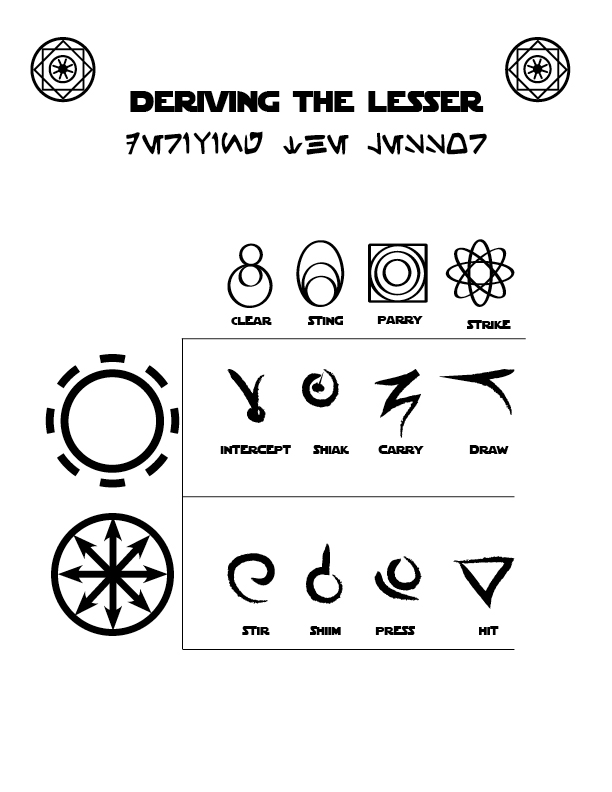
The 8 Zhu represent the basic foundations for all movements to follow. They are part physical and part abstract, hence the word “zhu” which has a meaning of trick or idea.
The tricks or “zhu” are the basic components of technique with the saber or sword. The rising phase of each is matched with its application and scenario. Energy rising and going forth will advance through aggression while the waning energy allows the enemy in to trap them. The main idea is this: everything has its contrary.
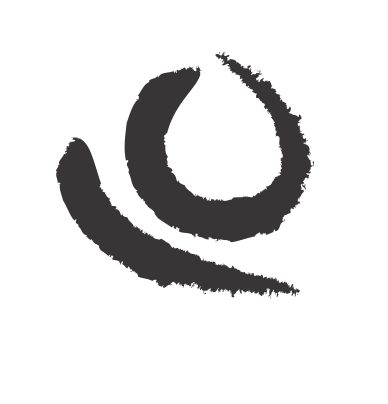
Dragon Follows the Moon
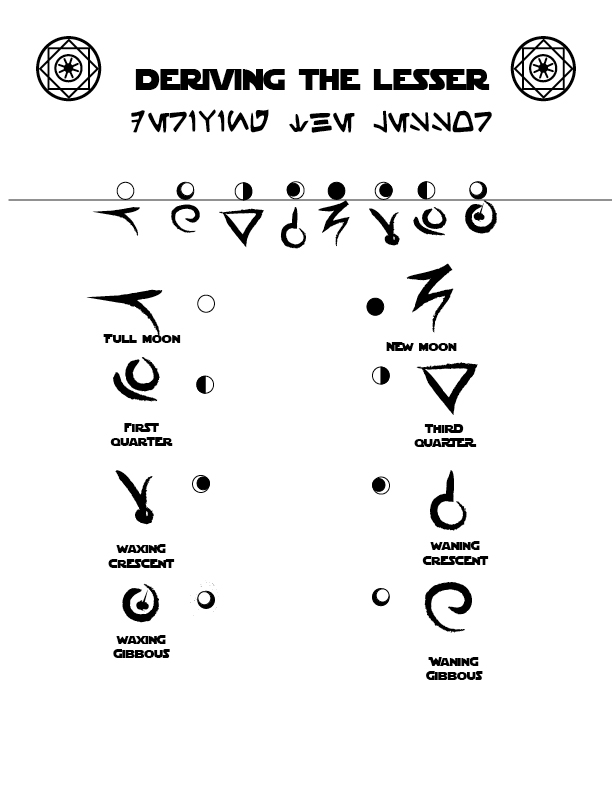
The phases of the moon are the most natural example of change and cycle there is. The Shien formula is based on the principle and uses the moon guards in sophisticated ways.
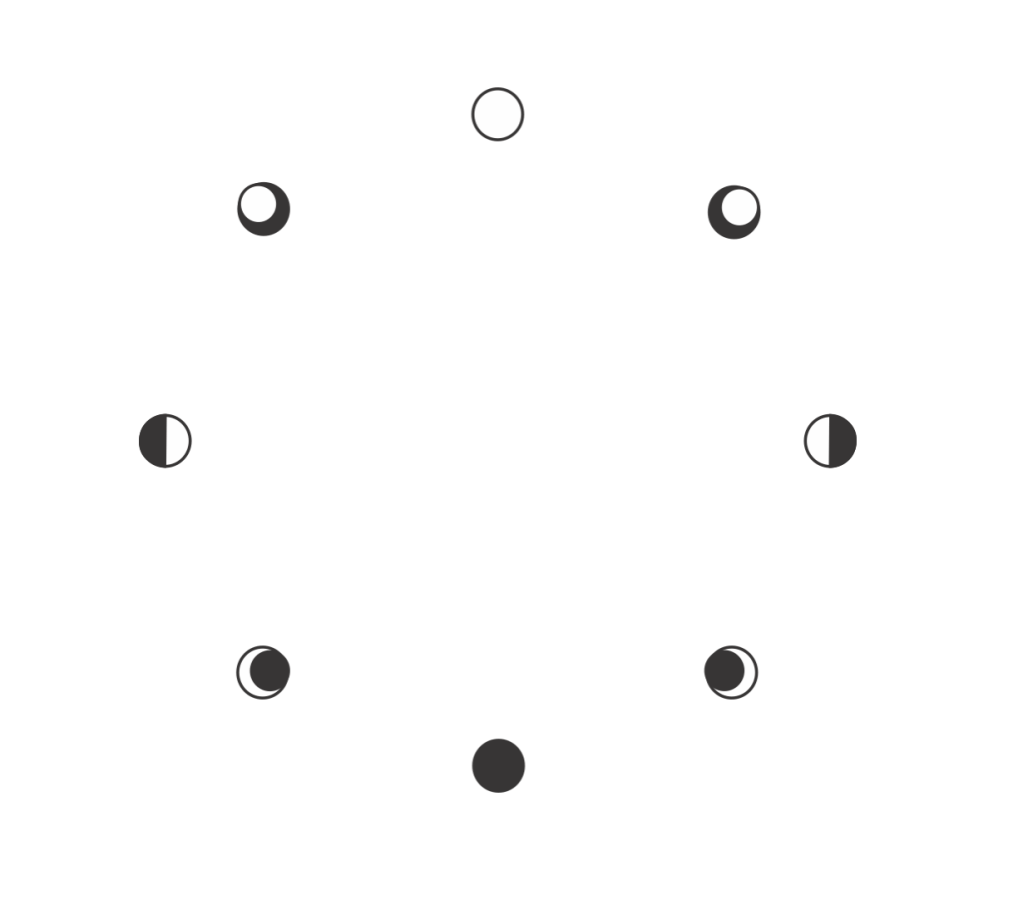
The moon phases are read in their natural arrangement. This represents the natural order of change:
New—Waxing Crescent—1st Quarter—Waxing Gibbous—Full—Waning Gibbous—3rd Quarter—Waning Crescent—New
Or starting with Full Moon:

Each of the “Zhu” is paired with the moon guard position that is best used with the idea. But, one should not get the wrong idea that these are the only uses of them. We use what is necessary, no more, no less.
What you get is the Shien Cycle:

Draw—Stir—Hit—Shiim—Carry—Intercept—Press—Shiak.
It is this sequence that holds up the Shien formula.
The moons and their matches is the essence of the Formula. The sequence represents the natural cycle of growth, development, entropy and death. knowing the sequence and how it relates to idea of change and adaptation is key to any success in understanding the lessons.
They also represent the progression of hilt and hand position known from Makashi as the moon guards. The same ideas will be used but expanded upon in the derivations that follow.
Explanation of the Zhu.
The waxing phases of each pillar:
Intercept: To meet the incoming attack or opponent. This is the ultimate secret of shii-cho: arrive first and cut them off from doing anything. The Sarlacc Sweep is its signature move and the picture perfect example of this concept. Rising up from underneath one can stop attacks before they begin. But interception is not merely crashing together with force, there must be a blending of movement and timing with with opponent. If this is off, the technique will fail.
Intercept is represented by the waxing crescent moon.
Shiak: This is the straight stab through the target (often zone 4). The energy rises through the weapon into the tip. Hold this steady and push the blade along this line. This requires set up and fineness. It has much in common with interception.
Shiak is paired with the waxing gibbous moon.
Carry: To bear over head, or interrupt a downward, often powerful strike. The use of the body is of paramount importance in this respect, for the force of the blow must be absorbed and redirected by the body. It also can be a lifting parry that raises the enemy weapon to throw their attack off target.
Carry is paired with the new moon.
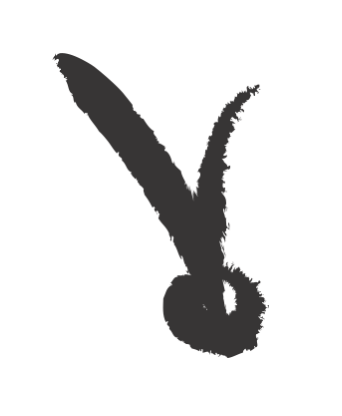
Draw: Going through and across a target. Sai strikes and the Su Ma blade work figure heavily in this tactic. It is extremely destructive and very fast but difficult to control. Learning to turn and spin to dissipate energy when needed is a very important skill for this method. If done correctly, a flowing series of attacks and parries not unlike an Ataru saber swarm are possible.
Draw is paired with the full moon.
The waning phase:
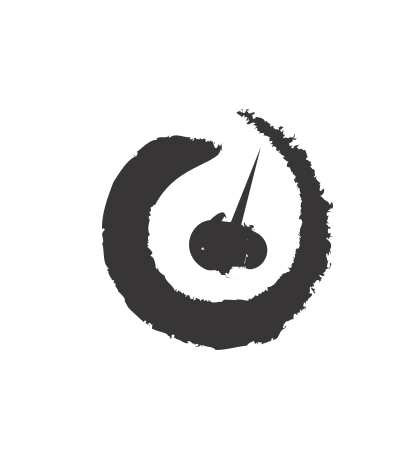
Stir: For this concept the honor sash serves as the example. One accepts an attack and redirects it around the body and returning that energy to the opponent. As a response to a rushing attack there are few better.
Stir is paired with the waning gibbous moon.
Shiim: This is the same technique as Shiak but this time you allow the weapon to fall sharply. Tags with the quick of the blade require the hilt to stay relatively still while the blade moves quick and punctuated.With two hands or one, this is the fastest strike in the arsenal.
Shiim is paired with the waning crescent moon.
Press: Bearing down and covering parries are the rule here. When on top of your opponents weapon force it to the ground where it will be no threat. If attacks come from underneath, stop them from rising. Pressing down with your entire body weight, lean and crouch on your saber to increase the force and overcome even the most aggressive of attacks.
Press is paired with the first quarter half moon.

Hit: To hit is to use a direct, penetrating force with the edge of the blade. Percussive strikes require the sinking of the body at the moment of impact as can be seen in both sai and cho. The direction of the blade matters little, the force must sink. This make it much easier to hit downward than upward in contrast to drawing. Also, Hitting or chopping often requires one to reverse their motion after a parry. By contracting and sinking, enormously effective attacks can ensue.
Hit is paired with the third quarter half moon.
Deriving the Lesser
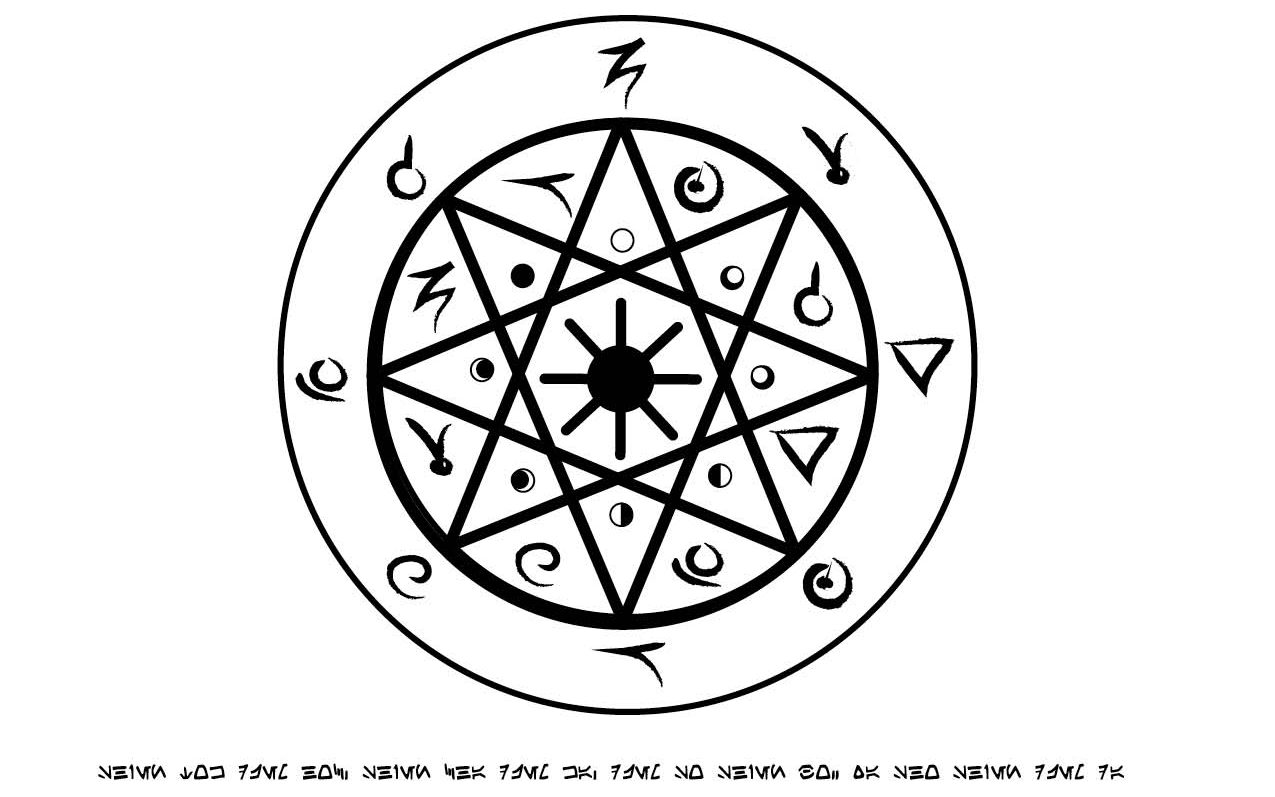
To derive the Lesser Krayt arrange the cycle clockwise around a circle.
Next, Place the Octagram in the center so that the moons line up with each point:
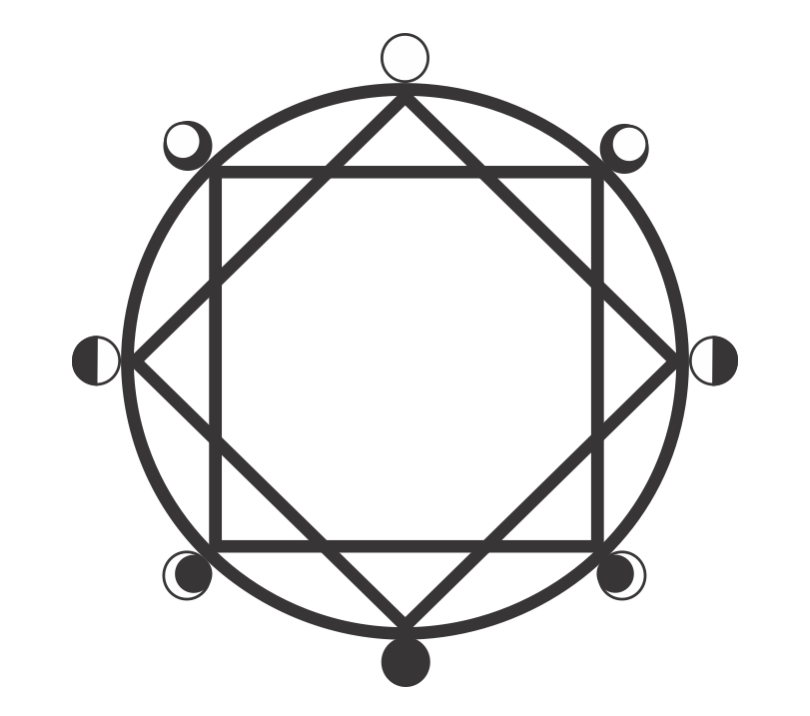
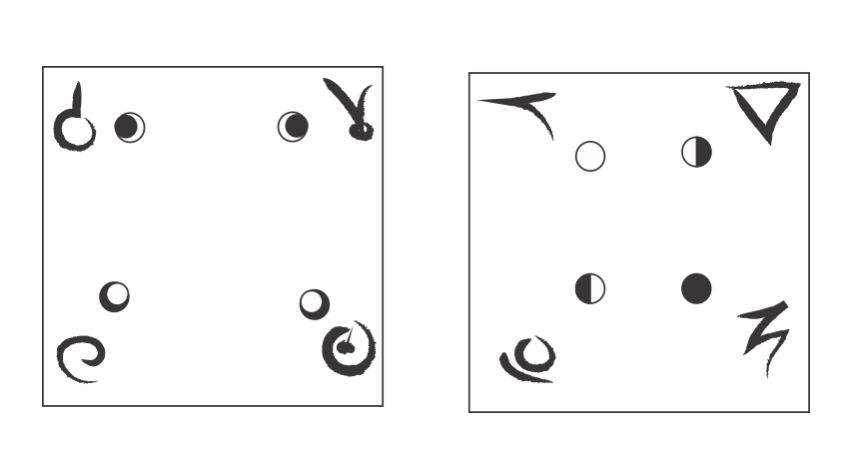
Place each Zhu in the corner with its corresponding moon.This will yield 2 tiles with four Zhu each.
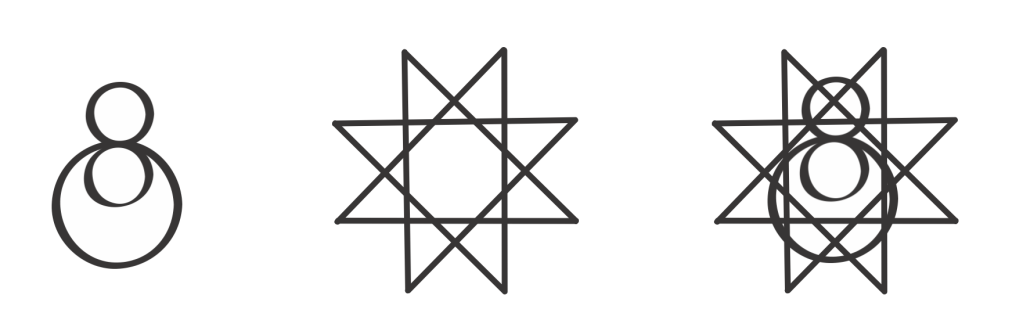
The major and minor phases will be grouped together: crescent and gibbous moons on one tile, quarters, full and new in the other. The top portion of the tiles are harmonized in Lesser Krayt. Waxing and Waning Gibbous on one and Full and 3rd quarter on the other. The reverse is obviously true for the lower portion. This process creates the Dragon’s Body:
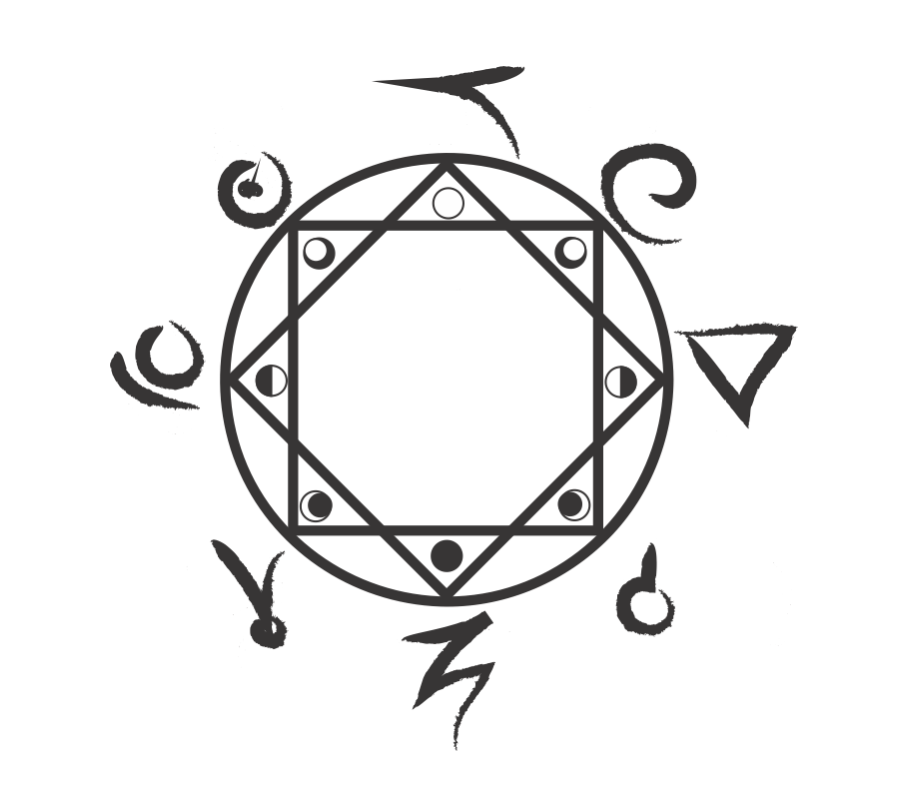
The Dragon Body is the core of the system. From this diagram the formula is expanded and furthered.
The Dragon Body diagram contains the first level of understanding in Shien. The basic ways the techniques fit together mechanically and intentionally is meditated upon here. The Lesser Krayt is read clockwise in the cycle, this is the simplest manifestation for the formula. For example: carry-hit-draw is not a lesser krayt combination. It would have to be carry-press-draw.
Deriving the Greater
The Greater Krayt is derived from the lesser.The dragon’s body sprouts limbs and reaches out for the center and around. To derive this diagram, extend the lines of the Octagram to form chambers between the squares:
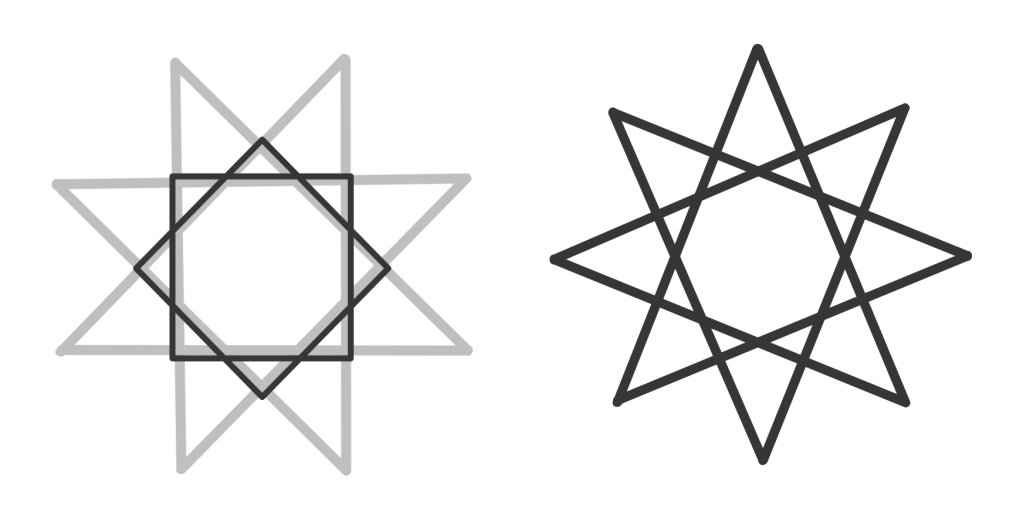
Here, the minor and major phases oppose. Place the Crescent moons on top and Gibbous on the bottom. When placed on the Octagram, the natural moon phases can be read crosswise.
This yields the Greater Krayt aspect, the Dragon’s Head:
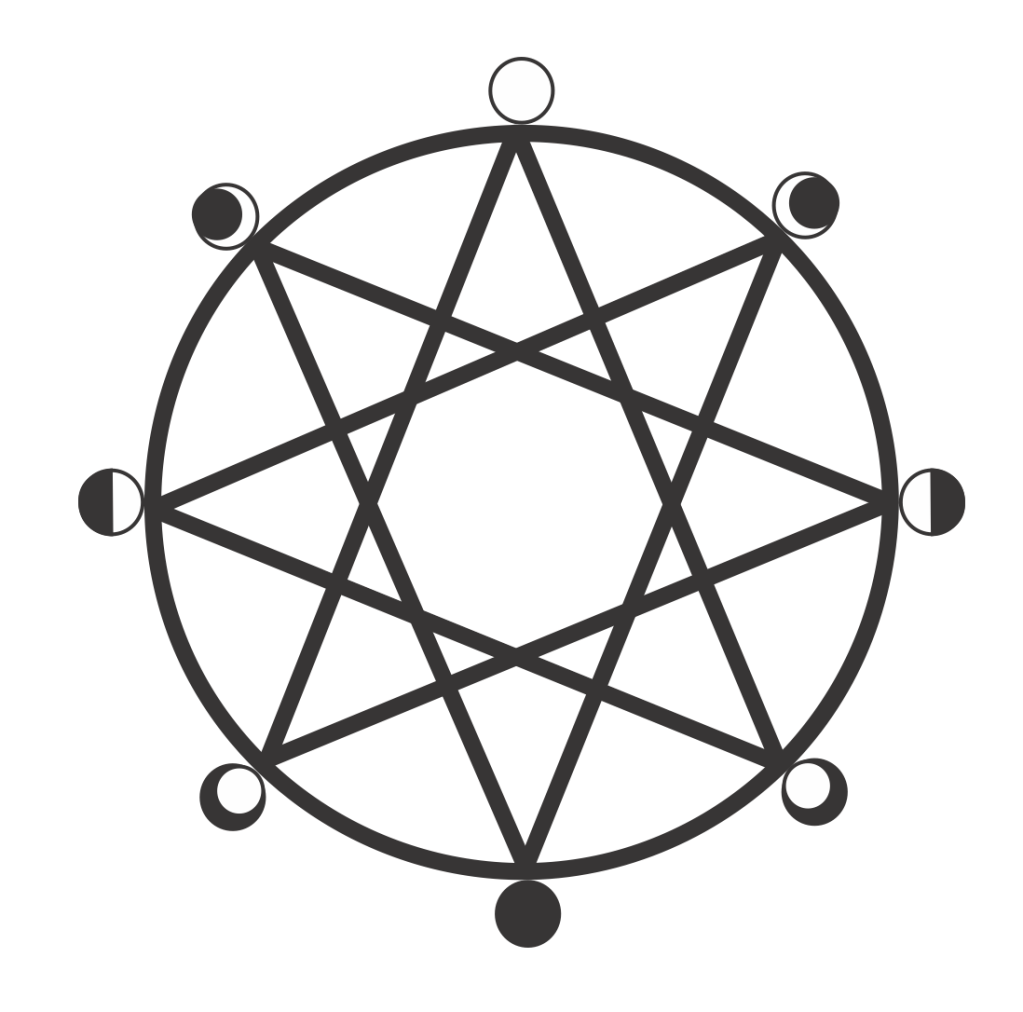
The Dragon’s Head is the full idea for the formula. The Lunar cycle controls natural ebbs and flows in both technique and combat. The natural extension of the Lesser Krayt, Dragon’s Body.
The Dragon’s Head diagram brings the sophistication of layered techniques and intentions. It is read crossways on the outside. If you start at full moon, you will go counter clockwise two spaces or follow the counterclockwise line across the circle.
The interpretations from the Dragon’s head become very inventive as the combinations are almost infinite. Where as in the Lesser Krayt you have a “stacking” of zhu, here you have interaction.
The Dragon’s head sprouts from its body. The Dragon’s Eye is set in the Dragon’s Head. To open the dragon’s eye, Take the moons and lay them out as they appear in the moon guards. The Lower portion of the diagram is waning while the upper part is waxing. Full and new moons on top as in Makashi. “Half moons” become the quarters (1st and 3rd). The Crescents on the side of new moon and the gibbous on the side of full:
If the Octagram is placed askew it can be overlaid with the 6 attack zones.
Combined, the Dragon’s Eye opens:
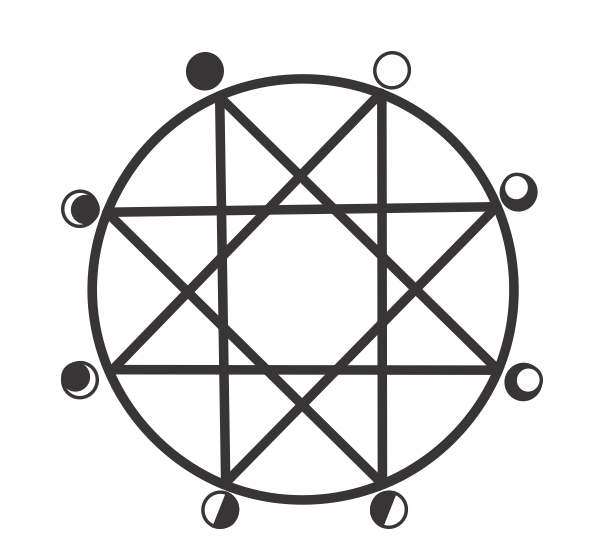
The Dragon’s Eye is the mechanics of the Form.From the arrangement you get the traditional moon phase associations with their moon guard positions.
Here the Octagram is broken into cross opposing phases corresponding to the Four Pillars. New Moon opposes First Quarter and Full Moon opposes Third Quarter, therefore, Carry opposes press, and Shiim opposes Shiak.

Form I and IV on one plane and II and III on the other.
The Greater Krayt diagram:
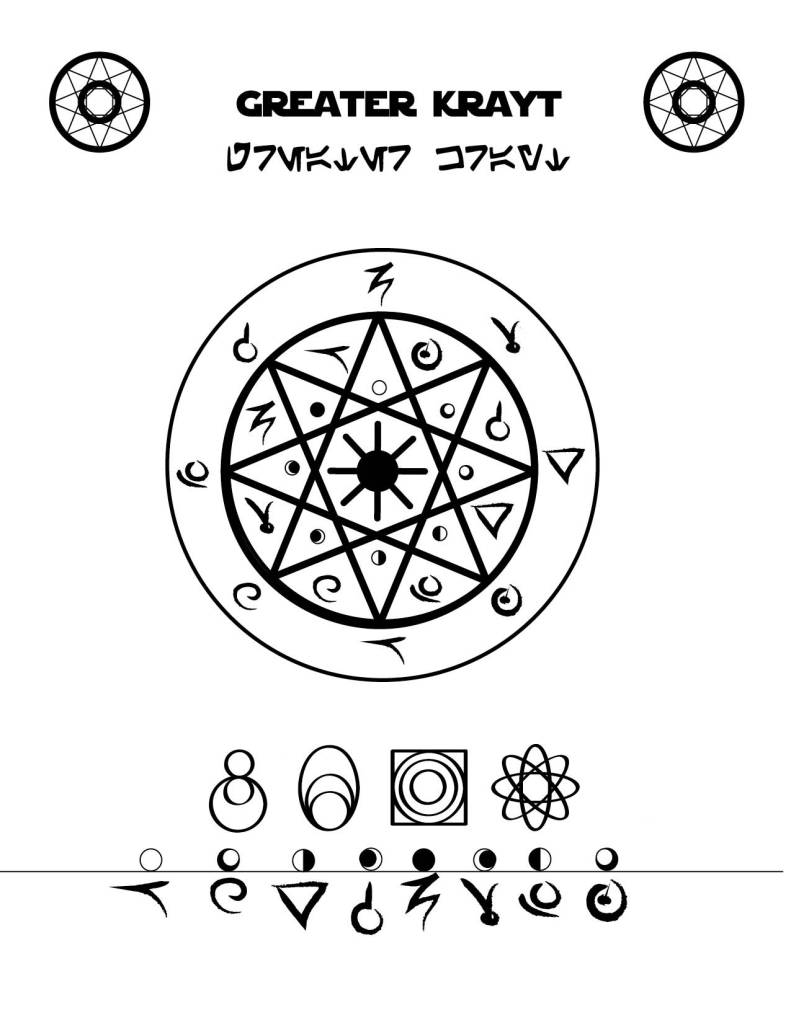
Once the Dragon’s Eye opens, one should be able to see the formula spread out before them. The Dragon’s Head comes from it’s body and is moved by it. The head whips back and forth able to fold and coil it’s self into surprising attacks. The dragon’s eye observes and allows the body and he’d to react.
End of Shien formula.
